Category - Getting Crafty

Summertime

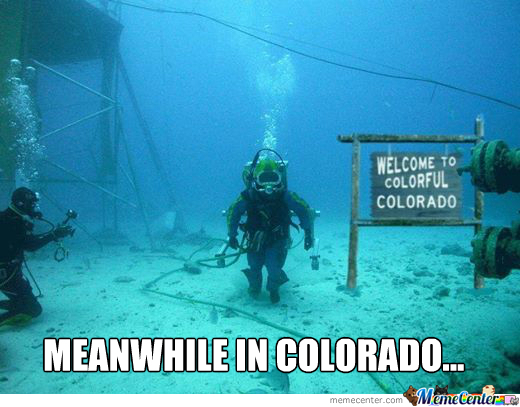
After a few years of drought, May 2015 was the wettest month on record.  Evah. We built an ark, but didn’t use it because as soon as May ended, the rain returned to a far more reasonable schedule.  And with 8″ of rainfall in one month, our creek held and I think maybe we can stop worrying about flooding from the Waldo Canyon burn scar.

colorado-floods_o_2200091

Boo is working the whole summer at a local BSA camp, teaching new scouts important New Scout Skillz.  Being under 18, he comes home every weekend for a little less than 24 hours.  He also brings home a friend, a fellow Catholic who goes to mass with us and is seriously the epitome of good manners.  I affectionately call him our summer son.

We also picked up an AF Academy cadet or two to sponsor through their time in the academy.  Their “Doolie Day Out” is coming up and we will be providing them with a soft spot to land, an opportunity to call home and a yelling-free zone.  We may actually have them AND our summer son here all at the same time.  Pumpkin Girl is not amused at this sudden influx of brothers, no matter how temporary.

exasperated2

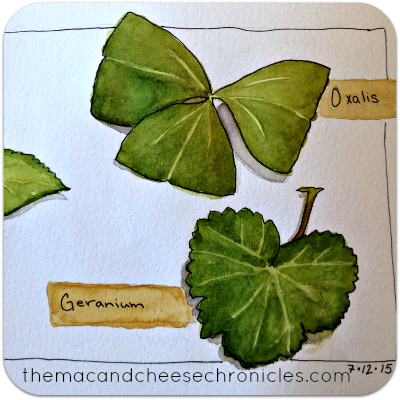
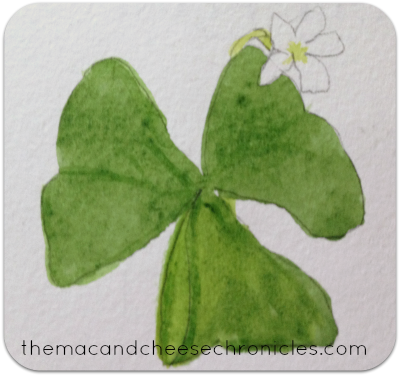
And I’m painting again!  I found a new online watercolor sketching class, this time by Jane LaFazio.  I’m a little rusty, but it’s coming back.  Honestly, I went from being the one struggling the most in my last class, to being right in the middle of this class. For comparison, here’s an assignment on mixing and using greens from my current class, followed by a quick sketch I did of the same plant, way back before I started taking lessons.  Go me!

oxalisafter oxalisbefore

Silhouette Fun

I got a Silhouette Cameo cutting machine a little while back.  I’ve seen projects around Pinterest and blogs for a while, but I didn’t think it was something I needed.  Plus, it’s expensive!  But you know me, I’ve rarely found a craft I didn’t like and all of a sudden I needed to have one.  Mostly because I can no longer find the vinyl saying in my music room and I want to replace it after we paint.  So yeah, had to have it.

Shakespearequote

I started with a label for my homemade laundry detergent.  I totally stole this idea from somebody else.

laundrysoup

I made some Christmas presents, including this lighted, frosted glass block.

WiseMenGlassBlock

And ring bowls for Pumpkin Girl’s friends.

RingDishes

All those projects are vinyl, but the Silhouette can do paper projects, too.  This one was for another of Pumpkin Girl’s friends.  I even made the matching envelope!

birthdaycard

I’m totally impressed with myself, er…the Silhouette. The birthday card and glass block are just files I purchased from the Silhouette store.  I made little Valentines for my children from purchased files, too.  (They seemed to have disappeared, so I can’t share pictures.)  I created the laundry soap label and the names for the bowls myself, just using fonts I have on my computer.

I really did need one, didn’t I?  Now…just to get around to that Shakespeare quotation.

Nutcracker Peg Dolls

I couldn’t help it, I had to make another set of Nutcracker toys for Pipsqueak.  The paper ones are fun, but let’s face it – he’s a 4 year old who is going to be rough on paper.

So I created these peg dolls.

I started off with sketching my ideas for the costumes, front and back.  I decided to go with the traditional Waldorf  idea of only putting eyes on the faces.  Mostly because faces are so darn hard.Nutcracker Sketch

Clara, the Nutcracker Prince and Drosselmeyer are based on Pumpkin Girl’s and the cast of Ballet Idaho’s costumes from last year.  Clara is a brunette, of course.  She always will be, in our house.

Clara and Nutcracker

Fritz was inspired by Pumpkin Girl’s costume with her ballet company, also from last year.

Nutcracker Peg Dollsabove: Rat King, Drosselmeyer, Clara, Fritz, Nutcracker Prince, Soldier

I got the idea for the Rat King from the dolls on tumblr here: Biciclette.And the soldier was inspired by this blog: Everything Etsy

Soldier and Rat KingPipsqueak loves his new set of Nutcracker friends.  They wage epic battles all over the house.  The Nutcracker usually wins.

Pipqueak with Peg Dolls

Nutcracker Fun for Everyone

October is here and for the first time in several years we are not completely overcome with the madness that is Nutcracker Rehearsal Time.  Pumpkin Girl has chosen to only participate in one Nutcracker production this year which leaves our Sundays completely free.  Bip and Boo are no longer playing soccer, so even our Saturday schedule has lightened up.

With last year’s All Nutcracker, All the Time schedule, Pipsqueak became quite enamored of all the characters.  He said he even wants to be the Rat King when he gets older. For now, he has his very own Nutcracker stuffed friend from Build-a-Bear, a gift from his godparents, and he was eyeing the custom dolls I had made for Pumpkin Girl, until she put them out of reach.  Not before he manage to straighten one of Clara’s curls, though.PipsqueakWithNutGuy

I went in search of some sort Nutcracker toys that I could make for him, but there isn’t really a whole lot out there.  Most everything is decorative, for display only. But I did find these really cool paper puppets. And even better, Clara is a brunette like Pumpkin Girl and the Nutcracker Prince has a similar costume as her prince.

(This is the point where she would say, “Mom, I can’t believe you’re talking about Clara again!”  Tough.)

Nutcracker Paper DollsHere I have them artfully posed just like in the pas de deux  that Pumpkin and her Prince dance. (Shush, honey, this is MY blog!)

FritzAndDrossThe Fritz paper doll looks nothing like Pumpkin, but that can’t be helped.

What I like about these is that I can print them out at home (I used card stock) and use mini brads that are easily found in craft stores.  And if they get ripped, I can easily make more.

The only thing is that Pumpkin Girl decided they are for her, so I need to make another set for Pipsqueak.  I may try laminating them with my Xyron machine first.

NutcrackerPaperDollsYou can purchase these paper puppets, including a stage at this link right here: Nutcracker Suite Puppet Theater


Red Robot for Pipsqueak

After a much needed blogging break, I am back and excited to share all the projects I’ve been accomplishing.  Every so often I need to rejuvenate by doing a little crafting.  And don’t worry, I will have both the May and June Christmas planning pages before June is over.

When your 3 year old asks you to make him a red robot (a red one, not a bluuuuue one), well, what can you do but comply? I mean, look at this cutie.  He’s got me totally wrapped around his finger.

CutePipsqueak
I actually found a pattern to make a toy robot on Etsy.  The pattern is for a bluuue robot, but I’m pretty smart and bought red felt for the body instead.

RobotPieces

He wasn’t hard to make, just time consuming with about a million pieces to trace, cut, sew and embroider.  The instructions called for an overhand stitch to sew the pieces together, but that never turns out well for me.  I learned to embroider from my aunt and my grandma one summer, and they taught me the importance of using small, neat stitches.  So I used the blanket stitch where ever I could.

Red Robot took about 2 weeks to put together, which seems  kind of  long. I spent 30 to 90 minutes working at a time and I didn’t work on him every day. So it really wasn’t that bad.

RedRobotI’m pretty happy with the way he turned out, but even more importantly, Pipsqueak loves him!

You can find the pattern here: Retro Robot

A Monster In the Hole of Your Jeans

A while ago a found a pin on Pinterest where someone repaired a hole in her son’s jeans by making a monster face out of it.  But she didn’t include any instructions.  Hmm. So I figured it out for myself and I even remembered to take pictures for a little tutorial.Monster Face Jean Repair

Supplies:
Ripped jeans
Fabric glue -I used Fabric-Tac, but use whatever you can find, just make sure it is washable.
Iron On patches
Felt scraps in red, white and black

I found all my supplies at Hobby Lobby.  The Fabric-Tac is hard to find, look for it with the fabric paint.

First, cut away all the strings from around the hole. Turn the pants inside-out.

HoleInJeans

Cut a piece of red felt to be a little bigger than the hole.  I think mine was half an inch bigger, all the way around.  I didn’t measure.  I just laid my felt over the hole and drew lines with a pen, then cut it out.

RedPatch

I used an iron on patch to give the felt some stability because  I didn’t think that the felt would last very long on its own. Get an iron-on patch that is bigger than the felt.  The bigger, the better.

Read the instructions for your patch.  Lay your jeans on the ironing board, center the felt over the hole, then center the patch over the felt *adhesive side down.*  Remember that you are working on the inside of the jeans.Patch

Iron the patch onto the jeans and felt, according to the patch instructions.

Turn your jeans right side out.  Now you have a hole patched with red felt!  Cut out eyes from the white felt and pupil from the black felt.  I made my eyes different shapes to be silly.  Cut teeth from the white felt, too.  Position the face pieces however you like them.  Move them around until you get the look you want.

Monster Face

You’ll notice that there is sort of a flap where the jeans fabric overlaps the felt but is not adhered to it.  Position the teeth so that they are just under that flap.  Glue them in place with the fabric glue.  You may need a toothpick to push the teeth into place.  Stick some glue under that flap and glue it down, too.

Glue the eyes into place.

Allow to dry and cure before washing.

Sit back and admire the silliness.MonsterFace

Pumpkin Girl Designs Planner Pages

I never really meant to get into the planner page design business.  But you know, when opportunity knocks, open an Etsy store!  So here I am, unveiling my Pumpkin Girl Designs printable planner pages.  Woohoo!

The Weekly Pages are available in 2 sizes, 5.5 x 8 inches and 8.5 x 11 inches and they run from October 2013 through December 2014. Each week is on the right side of the planner with a To Do list on the right.

Weekly Planner includes

* 4 cover sheets – choose your favorite, print, and add your name and/or the year
* Predated weekly calendars (September 2013 through December 2014)
* To Do list to the left of the weekly page to help you keep track of all your many tasks
* Untitled, lined pages for notes
* Instructions for printing

Pages are designed to be printed back-to-back according to your own printer’s settings.  (You will need to cut you papers in half after printing to get a half sheet/junior size page.) A half inch margin is already set for you to allow spiral, three hole, or disc binding.

Cover Sheets Easy to Print

Half Sheet Open

(That picture only shows the half size as an example.  Full size pages also available.)

The Monthly Pages are available as a separate purchase and are also available in 5.5 x 8 inches and 8.5 x 11 inches.  They also run from October 2013 through December 2014.

Monthly Planner includes

* 4 cover sheets – choose your favorite, print, and add your name and/or the year
* Predated monthly calendars (September 2013 through December 2014)
* To Do list
* Untitled, lined pages for notes
* Instructions for printing

Pages are designed to be printed back-to-back according to your own printer’s settings. A half inch margin is already set for you to allow spiral, three hole, or disc binding.

monthly separateMy goal in creating these pages for myself was to make something simple but fun and functional – and hopefully you’ll love them, too.  I do plan to offer personal size pages for 2014, plus add-ons like meal planning pages.  Come check out my Etsy store here:  Pumpkin Girl Designs.

More Free Planner Pages!

Wow.  I did not intend to let a whole month go by without blogging.  I have been using all my computer time making planner pages to sell and setting up an Etsy shop.  But first, let me offer my *monthly undated* pages for free. You will need to add the name of the month and the dates yourself with rubber stamps or stickers or however you like.  I did write in the year for you, so I have some for both 2013 and 2014.  I am offering half size/junior pages (5.5 x 8 inches) and full size pages (8.5 x 11 inches).  This is in addition to the undated weekly pages I offered earlier.

Free 2014 Planner Pages

Since I have lots of pages and sizes I put them all in one convenient spot for you.

Planner Pages by Pumpkin Girl Designs

And tomorrow I will introduce you to my new Etsy shop where I have the pre-dated pages available for purchase!

Free Planner Pages

I joined a Planner Addicts group on Facebook.  That’s probably not too much of a surprise, is it?  And oh! the planner love we’ve been sharing.  One of my first posts was to share a picture of the planner that I created and I was a bit blown away by the response.  Everyone wanted one!  So I will be offering the dated pages for sale just as soon as I can figure out the method to do that over the interwebs.

The Perfect Planner

But for now I am offering the undated pages for free!  They are half sheet size, 5 1/2″ x 8 1/2′. They look just like the ones in the picture, but there is no months or dates on them.  They do have the days of the week, though.  You can add the months and dates yourself with stamps or stickers or whatever.  The file includes two pages so that you can set your printer to duplex or double sided printing.  Once you have them printed out, cut them in half at the 5 1/2″ mark.  Then punch them to fit your favorite planner.

Free 2013 Planner PagesFree 2014 Planner Pages

Oh, and I did include the year, so there are two separate files, one for 2013 and one for 2014. The are PDF files, right click, then save link/file as…

2013 Blank Planner Pages
2014 Blank Planner Pages


Creating My Planner

After trying a couple of different planners over the years and wasting time doing extensive research on the Internet, I came to one conclusion. I need to create my own. Actually, in doing my research, I found several people who made their own planners. I guess planners are highly personal.

I was particularly inspired by how Jennifer at I Heart Organizing created her own planner pages. I like that they are colorful but clean. But still not with the week plus to-do list layout I wanted.

So I created my own pages. Clean, colorful, fun, pre-dated. One week on one side, matching To-Do list on the other. A Martha Stewart Discbound notebook as the cover.

planner cover

I really love this cover.  The blue is soothing and pretty, but the silver discs really make it sing.  I would have liked to have found it in pink (Hello, Martha- are you listening?), but this one is nice, too.The Perfect Planner

I  love, love, love how this turned out! Lots of space to write.  Bright and cheerful.  A To Do list.  What more could a girl want?

planner tabs

I used Martha Stewart tabs and my label maker here.  I can’t find the tabs anywhere anymore, I just happened to have used them on last year’s planner.  I actually couldn’t even find them in my house, either, until the day I took this picture. They are made from a sturdy card stock and the adhesive part is strong, too.  Martha? Yeah, you need to bring these back. (As if Martha reads my blog!)

True confessions time.  I totally copied the title page from Jennifer at I Heart Organizing.  I just really liked it and my inner graphic designer took over and I couldn’t help it.  On the other side is my “if found, please contact…” page. In the little pockets in the front cover I tucked our family cards and our Pumpkin Girl Designs business cards.
planner title page

I was surprised at just how easy this was to put together. I worked on it a little at time and once I got the template made it went very quickly.  I skipped monthly view calendars because I never use them.  I skipped a perpetual “special days” page as well, mostly because I couldn’t it to the right size, but I never use those pages anyway.  For filler pages I just used the pages that came with the binder.  I tucked them in the back for when I need more extensive notes than just a To Do list.

So there you have it!  Nothing to fancy, but totally customized to fit my needs.  What do you think?

Copyright The Mac and Cheese Chronicles 2020.  All rights reserved. Images and content may not be used without express permission.